Carpet has been a versatile and highly-functional floor treatment for ages. Installation of carpet requires basic techniques and skills to get precision and accuracy in floor finishing. In this article, Grass Carpet has unlocked some practical and useful tips for carpet installation as a DIY project. Following our comprehensive recommendations and guide, you can complete your DIY project in minimum time and effort.
Carpet Installation | Useful Tips For DIY Project
An adequately installed sisal carpet provides maximum warmth and comfort. Besides this, it also improves the soundproofing and aesthetics of the room surface. This DIY guide has listed some effective tips and essential supplies to cover your floor with a perfect carpet piece.

Required Supplies For Carpet Installation
- Tack Strips
- Stair Tool
- Measuring Tape
- Knee Kicker
- Knee Pads
- Power Stretcher
- Carpet Roller
- Seaming Iron
Take Floor Measurements
Before installation, you need to take precise floor measurements with the help of measuring tape. You should measure the length and width of the room floor and then add 2-3 inches extra in each measurement for size satisfaction. After measuring dimensions, multiply both these values to get floor area in square footage. In case of irregular floor area, you can divide the floor into different rectangular and square parts for the perfect cumulative area.

Clean the Floor Surface
After ensuring the perfect-sized carpet, underlay, and other essential materials, you should clean the floor surface. If the floor surface has dust particles, these can move the carpet slowly from the floor surface and cause mold growth after reacting with moisture content. For cleaning, you can use a microfiber cloth and brush. However, if your floor surface is rough and has holes, you should use high-quality fillers and adhesive materials.
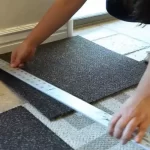
Carpet Tack Strips Installation
The wood-made carpet strips are used on the floor to tie up the carpet corners and edges. These strips are designed with upward pointed tacks for firm attachment of carpet to the subfloor. By using these strips, you can prevent the formation of wrinkles and unusual alignment of carpet edges. Moreover, these useful strips can ensure that the carpet is fully stretched on the floor surface. You can install these strips on any type of subfloor, such as wooden or concrete floors.

Leave a Gap Between Wall And Tack Strips
While fixing the tack strips, it must be ensured that there is a gap of ¼ inch between the wall and carpet strips. In addition, carpet thickness should be more than the gap because it will ensure firm attachment against the subfloor. The strips should not be placed against the wall surface to avoid paint damage. Moreover, you should also leave a gap to stick carpet edges over strips.
Leave Old Strips in Place
In case you replace the old carpet with a new one, you may leave the old fixed strips in place for reuse. If strips are in a good condition (properly intact) , you can reuse them. If you find any torn strip in the carpet parameter, you should not use it again to avoid later-on stability issues. Moreover, in case of mold and fungal development, some carpet strips are also affected and cannot be used again.

Attach Padding Material Between Strips
After fixing the carpet strips, the next step is to place padding material between the strips. While placing, you should keep the padding inside the strips of all carpet parameters. Don’t overlap the padding material on the strips to prevent the thick lump development. While placing the padding material in the right position, check for wrinkles or any other obstruction.
Use High-Quality Padding Material
The use of high-quality padding material beneath the carpet ensures maximum comfort, smoothness, and carpet durability. High-quality and resilient padding can enhance the longevity of low-quality carpets. You can analyze the quality of padding material by its density (at least 6 pounds) and thickness. If the old padding material is thin, try to replace it with a new one.

Always Buy Extra Carpeting Material
While buying carpet for flooring, always keep exact floor measurements. Buy 10% extra carpeting material to prevent shortage at any corner of the floor. For example, if you need 50 square feet of carpet for a 500-foot surface area, get 55 square feet of carpet. Having extra carpet materials also ensures perfect floor finishing after bending or cutting excessive carpet from the sides.
Analyze Carpet Roll Widths With Layout
Usually, carpet rolls come in 12, 13, and 15-foot width rolls. In order to prevent seaming multiple carpet parts, you should choose a carpet that is wider than your room. Moreover, always try to get some extra wide wall to wall carpet roll than required ones. For example, if your room width is 10 feet, you may take an 11-foot wide carpet roll for smooth and easy installation. While placing the carpets on the floor, always check the pile texture and direction.
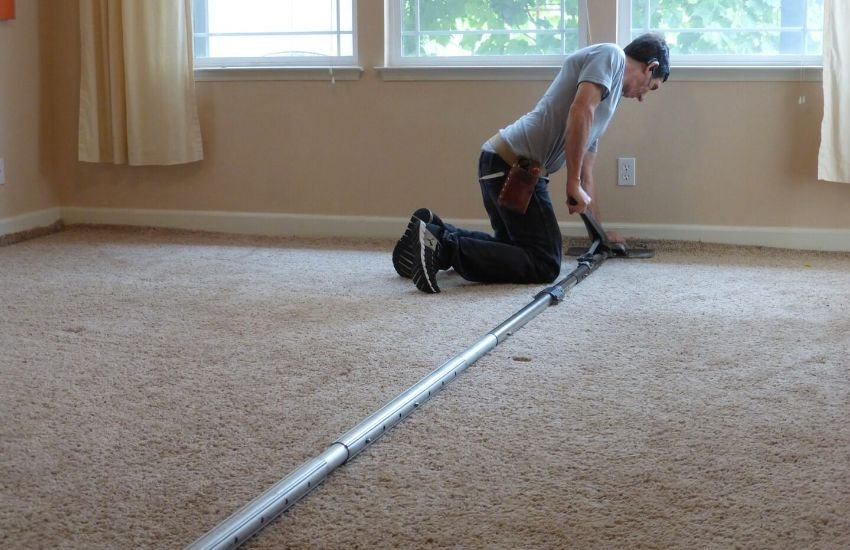
Stretch The Carpet To Remove Wrinkles
After carpet installation, you should remove the wrinkles with the help of knee kickers. Always start from the center of the carpet and move toward the walls. You can wear knee pads to prevent yourself from harsh resistance. As you move away from the center while removing wrinkles, the carpet surface will start to get smooth. You can also use power kickers to straighten the large-sized carpets.
In A Nutshell!
Finally, we can say that carpet installation is not a difficult DIY project; hence, it requires technical knowledge about tool usage and measurements. However, we have elaborated some technical tips for effective and smooth carpet installation. By following our incredible tips, you can achieve the goal of carpet installation by yourself.