
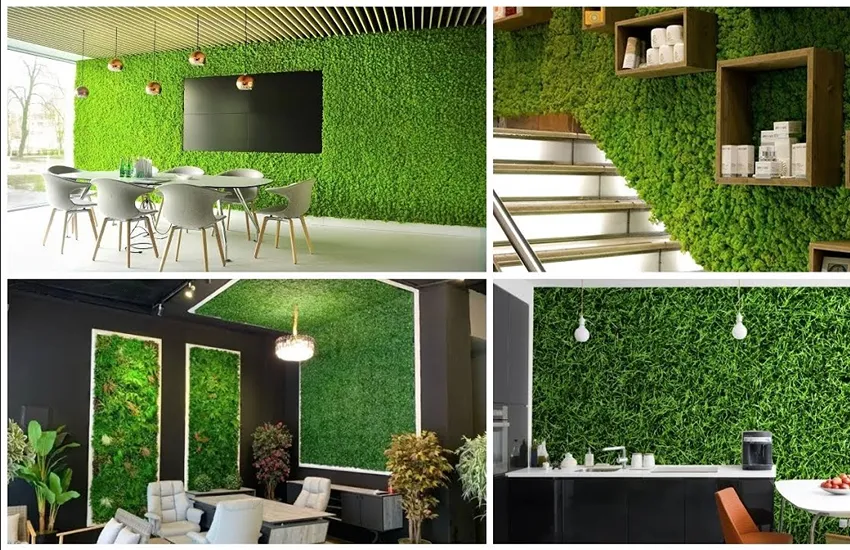


Artificial grass works well as a wall covering for homes, offices, cafés, shops, balconies, and event spaces. You can install it on concrete, brick, wood, plaster, and some drywall surfaces when you choose the right fixing method. To fix artificial grass on wall, measure the area, prepare the surface, cut the grass, position it, apply the suitable fixing method, secure the edges, and finish the fibres.
The right method depends on the wall material, grass weight, installation location, and whether you want a permanent or removable installation. Indoor decorative panels often need a different approach from a large outdoor grass wall.
Can You Fix Artificial Grass on a Wall?
Yes. Artificial grass works on many common wall surfaces when the wall has enough strength and the fixing method suits the material.
Common surfaces include:
- Concrete
- Brick
- Wood
- Plaster
- Drywall
- Plywood or other backing boards
Surface preparation matters because dust, loose paint, moisture, cracks, or weak areas affect how well adhesive, tape, staples, or mechanical fixings hold. If you are preparing a wall for artificial wall grass, a clean and stable surface helps create a more secure installation.
Check the wall before starting. Remove loose material and repair damaged areas. For heavy grass panels, use mechanical fixings or a suitable backing structure rather than relying only on adhesive.
What You Need to Fix Artificial Grass on a Wall
Prepare your tools before installation:
- Artificial grass or artificial grass panels
- Measuring tape
- Pencil or chalk
- Utility knife
- Straight edge
- Spirit level
- Suitable adhesive
- Staple gun
- Screws and wall plugs
- Drill
- Mounting tape
- Hook-and-loop strips
Your fixing method determines which tools you need.
Adhesive suits smooth, sound surfaces. Staples work well on wood and timber backing. Screws and wall plugs suit masonry walls. Mounting tape or hook-and-loop strips suit lightweight decorative sections where the wall and product allow removable fixing.
If you still need to select grass, compare pile height, backing type, panel size, weight, and indoor or outdoor suitability. A local artificial grass shop in Dubai is useful when you need to compare different grass types and backing options before installation.
Choose the Right Fixing Method for Your Wall
Adhesive Method
Adhesive offers a clean finish because it hides the fixing points. It suits smooth and stable surfaces such as concrete, painted masonry, plywood, and some plastered walls.
Clean the wall first. Remove dust, grease, loose paint, and other contaminants. Use an adhesive designed for the wall material and artificial grass backing. Follow the manufacturer’s application instructions, including coverage and curing time.
Avoid moving the grass while the adhesive cures. Heavy panels often need additional support during curing.
Staple Method
Staples work best on wood, plywood, timber frames, and other surfaces suitable for staples. Position staples along the backing rather than through visible grass fibres.
Place them around the perimeter and at suitable intervals across larger sections. Press the backing flat before firing each staple. Use the grass fibres to hide the fixing points.
Check the staple length before starting. Staples should hold the backing securely without damaging the supporting surface.
Screw and Wall Plug Method
Screws and wall plugs provide mechanical support on concrete and brick. Drill holes at suitable fixing points, insert the correct plugs, and secure the grass backing with screws and washers where needed.
Avoid placing fixings in weak mortar areas on brick walls. Masonry fixings should sit in sound material. For large installations, distribute fixing points rather than relying on a few screws.
Double-Sided Tape or Hook-and-Loop Method
Mounting tape and hook-and-loop strips suit lightweight decorative panels and temporary displays. They work best on clean, smooth surfaces.
These methods have limits. Heat, dust, humidity, textured walls, grass weight, and repeated movement affect their holding strength. Test a small section first before fixing a large panel.
How to Fix Artificial Grass on Wall
Follow these steps for a neat artificial grass wall installation.
Step 1: Measure the Wall
Measure the full height and width of the installation area. Record measurements in several places because walls are not always perfectly square.
Mark doors, windows, sockets, switches, corners, pipes, and other obstacles. Measure each opening separately.
Add a small cutting allowance where appropriate. Avoid adding excessive material because large overlaps make trimming harder.
For multiple panels, plan the layout before cutting. Mark where each panel starts and ends.
Step 2: Prepare the Wall Surface
Clean the wall with a suitable method for the surface. Remove dust, grease, loose paint, and flaking material.
Repair cracks, holes, and weak areas. Allow repairs to dry before installation.
The surface must be dry before using adhesive, mounting tape, or other moisture-sensitive fixing products. Check outdoor walls for signs of water penetration.
A clean and stable wall gives your fixing method a better base.
Step 3: Measure and Cut the Artificial Grass
Place the grass on a clean surface with the backing facing upward. Mark your measurements on the backing using a pencil or chalk.
Use a straight edge to guide the cut. Cut from the backing side with a sharp utility knife. This approach helps reduce damage to the visible grass fibres.
Make several light passes instead of forcing the blade through a thick backing. Keep your fingers away from the cutting path.
For windows, sockets, and unusual shapes, create a template from cardboard first. Transfer the template to the grass backing and cut carefully.
Step 4: Position the Grass Before Fixing
Dry fit the grass against the wall before applying adhesive or permanent fixings.
Check the grass direction. All panels should face the same way so the fibres have a consistent appearance.
Use a spirit level to check vertical and horizontal alignment. Check corners and openings before fixing anything.
For several panels, place them together first. Look at the seams from normal viewing distance and adjust the layout if needed.
Step 5: Apply the Chosen Fixing Method
Now secure the grass using the method suited to your wall.
For adhesive, apply the product according to its instructions. Work in manageable sections and press the backing firmly against the wall.
For staples, start along the upper edge. Keep the backing flat while adding fixings around the sides and lower edge.
For screws, mark the fixing points, drill the wall, insert suitable plugs, and secure the backing.
For tape or hook-and-loop strips, clean both contact surfaces first. Apply the strips according to their product instructions and press the grass firmly into position.
Step 6: Secure the Grass
Work across the panel instead of fixing one edge and leaving the rest loose.
Smooth the backing as you move along. Remove wrinkles before securing each section.
Pay close attention to the corners and perimeter. Loose edges often become the first area to lift, especially on outdoor walls.
For large panels, use enough fixing points to support the grass weight. The required spacing depends on the grass backing, panel size, wall material, and fixing product.
Step 7: Trim the Edges
Once the grass sits securely, trim excess material along the perimeter.
Use a sharp utility knife and make controlled cuts. Follow corners slowly.
For sockets, switches, windows, and other openings, cut smaller sections gradually. Check the fit after each cut.
Keep edges straight where the grass meets trim, flooring, ceilings, or other wall finishes.
Step 8: Brush and Finish the Grass
Installation often presses some fibres flat. Brush the grass gently with a suitable stiff brush to restore the pile direction.
Check every seam. Look for visible gaps, raised edges, exposed staples, loose screws, or areas where the backing does not sit flat.
Make final adjustments before considering the installation complete.
How to Fix Artificial Grass on Different Wall Types
How to Fix Artificial Grass on a Concrete Wall
Concrete provides a strong base when it remains sound and dry. For heavier installations, use masonry screws and suitable wall plugs.
Mark the fixing points and drill with a masonry bit. Insert the plugs and secure the grass backing with screws and washers where appropriate.
A suitable construction adhesive also works on compatible concrete surfaces. Follow the adhesive manufacturer’s instructions for surface preparation and curing.
How to Fix Artificial Grass on a Brick Wall
Brick walls suit mechanical fixings when you drill into sound brick. Avoid weak or crumbling mortar joints.
Mark your fixing points before drilling. Use plugs and screws designed for masonry.
For lightweight decorative panels, a compatible adhesive offers another option when the brick surface has suitable condition and texture. Test adhesion before covering the full wall.
How to Fix Artificial Grass on a Wooden Wall
Wood provides several fixing options. Staples offer a fast method for many lightweight grass products. Screws work well for heavier sections or areas needing stronger mechanical support.
Adhesive also suits some wooden surfaces. The wood should remain clean, dry, and structurally sound.
For a timber frame, plan your fixing points around the frame members so the screws or staples have solid material behind them.
How to Fix Artificial Grass on Plaster or Drywall
Plaster and drywall need more care because the surface layer does not always provide enough support for heavy grass.
Check the wall strength first. For larger or heavier installations, attach a suitable backing board to structural points, then fix the grass to the board.
Lightweight panels suit some drywall applications with suitable anchors or removable fixing systems. Follow the weight rating of the chosen fixing product.
Avoid relying on ordinary adhesive or tape when the wall surface is weak, dusty, damaged, or poorly bonded.
How to Fix Artificial Grass on Wall Without Drilling
A no-drill installation often uses adhesive, mounting tape, or hook-and-loop strips.
These options suit lightweight panels and decorative applications. They work best on smooth, clean, dry surfaces.
Before covering the entire wall, test the selected fixing method on a small area. Allow the product to reach its recommended holding time before testing it.
No-drill methods have practical limits. Heavy grass, rough surfaces, outdoor heat, moisture, and large panels place greater demands on the fixing system. A mechanical fixing or backing structure offers stronger support for many large installations.
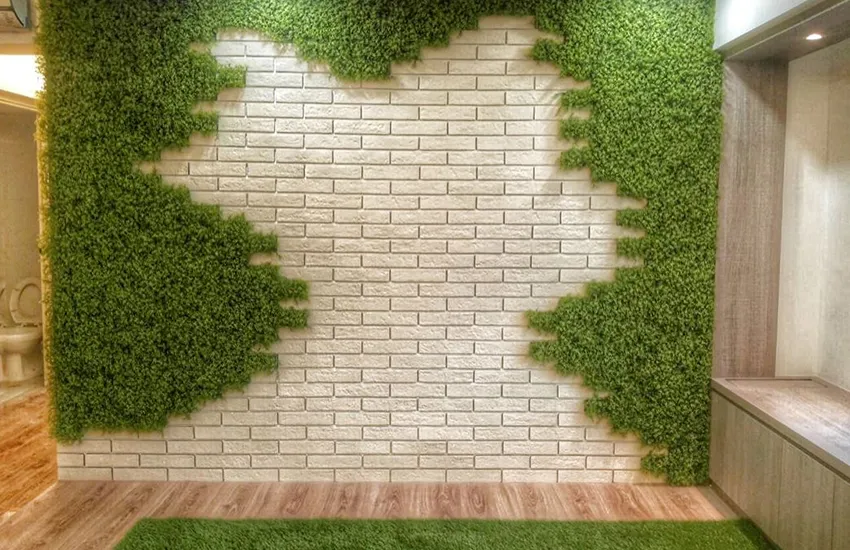
How to Fix Artificial Grass on an Outdoor Wall
Outdoor installations face conditions that indoor walls do not. Select grass rated for outdoor use and consider UV exposure when choosing the product.
Use an outdoor-rated adhesive where adhesive forms part of the fixing system. Mechanical fixings add physical support, especially for large panels.
Pay extra attention to the top, bottom, corners, and side edges. These areas need secure fixing.
Hot climates such as Dubai require careful planning around direct sunlight, wall temperature, and moisture. Avoid installing onto a damp wall. Inspect the installation periodically for lifted edges, loose fixings, adhesive failure, or backing damage.
Where strong sun hits the wall for long periods, follow the grass and adhesive manufacturer’s suitability guidance.
Common Mistakes When Fixing Artificial Grass on a Wall
Avoid these common problems:
- Fixing grass to a dirty wall
- Choosing an adhesive unsuitable for the surface or backing
- Measuring only once
- Cutting from the visible grass side
- Misaligning adjacent panels
- Using weak fixings for heavy grass
- Leaving edges loose
- Installing over a damp surface
- Ignoring outdoor exposure
- Skipping a small fixing test
A short preparation stage often prevents difficult corrections later.
How to Make an Artificial Grass Wall Look Professional
A neat installation depends on more than secure fixing.
Keep every grass panel facing the same direction. Consistent fibre direction gives the wall a uniform appearance.
Plan seams before fixing the panels. Position seams in less noticeable areas when the layout allows it.
Keep the perimeter straight. Take extra care around corners, windows, sockets, and doors.
Match panel alignment carefully. Uneven joins stand out on large walls.
Brush the grass after installation to lift compressed fibres and improve the finished appearance.
You also have decorative options. Artificial flowers, foliage, signs, lighting, and branded elements work well for selected residential and commercial designs. Keep decorative additions securely attached and avoid adding excessive weight to the grass backing.
How Long Does Artificial Grass Stay Fixed on a Wall?
There is no single service period for every wall installation.
The installation’s longevity depends on several factors:
- Wall condition
- Grass weight
- Backing construction
- Fixing method
- Adhesive quality
- Fixing spacing
- Indoor or outdoor exposure
- Direct sunlight
- Moisture
- Installation quality
- Ongoing maintenance
A lightweight indoor panel fixed to a clean wall faces different conditions from a large outdoor grass wall exposed to heat and weather.
Follow the product manufacturer’s recommendations for both the grass and fixing system.
When Should You Hire a Professional for Artificial Grass Wall Installation?
Professional installation makes sense for large or complex projects.
Consider professional help for:
- Large feature walls
- High walls
- Outdoor installations
- Uneven or damaged surfaces
- Difficult corners and openings
- Heavy grass panels
- Commercial spaces
- Reception areas
- Restaurant and retail installations
- Projects where a highly consistent finish matters
Professionals also have the equipment and experience needed for complex cuts, large panels, structural backing, and difficult access.
Final Thoughts
Learning how to fix artificial grass on wall starts with choosing the right fixing system for your surface. Measure the wall carefully, prepare it properly, cut the grass from the backing side, dry fit each section, and secure the material with suitable adhesive, staples, screws, or removable fixings.
For concrete and brick, mechanical fixings often provide useful support for larger installations. Wood works well with staples and screws. Plaster and drywall require extra attention to wall strength and backing support. Outdoor walls also need products suited to exposure, secure edges, and periodic inspection.
A careful installation gives your artificial grass wall a cleaner finish and helps reduce problems with loose edges, visible seams, and movement over time.